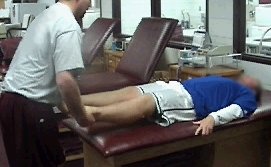
Assessing Leg Length is important for preventing injury, treating injury, and increasing performance. It is a simple process that involves a table and a close to eye. It is a fluid movement, which can be broken down into 5 parts for ease of explanation. The total movement should take less than 5 seconds or so. The biggest mistake many clinicians make is not ensuring that the athlete is fully relaxed upon the completion of the movement. This can give you poor accuracy.
Step 1Have your athlete lie on their back with their legs straight. Grasp the back of their heels and encourage them to relax. |
 |
Step 2Bend the athlete’s knees and passively take them toward their chest until they reach maximum hip flexion. |
 |
Step 3Bring their feet down to the table so their feet are flat with their knees bent. With their feet even, it is now possible to assess their anatomical leg length. You can do this by ensuring that their feet are even and then look at the tops of their knees to see if one knee is higher than the other or if one knee is closer to you than the other. This is not a 100% accurate method of assessing Anatomical LLI, it will give you an idea if one leg if you should suspect an Anatomical LLI.
|
 |
Step 4Have the athlete bridge their hips up as high as possible to fully set the pelvis to neutral. |
 |
Step 5
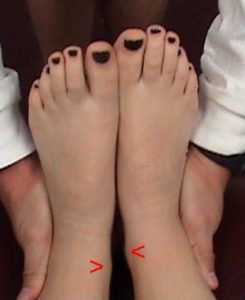
Passively distract the ankles with the athlete COMPLETELY relaxed. At this point, look down at the medial malleolus (inside ankle bones)
to see if one leg is longer than the other. At this point, the athlete is also set to palpate the pelvis to assess for Lumbopelvic Dysfunction (see Below).
For detailed information, click on the appropriate link below to learn everything you need to know about the specifics of lumbopelvic dysfunction, including prevalence, causes, contributing factors, related injuries and treatment.
Lumbopelvic Dysfunction
Anterior Rotation
Upslip
Anatomical Leg Length Inequality
Functional Leg Length Inequality


Leave a Reply